Aerospike Secret Agent to read secrets from Google Cloud Secrets Manager
Learn how to set up Aerospike Secret Agent to retrieve secrets from Google Cloud Secrets Manager. Follow step-by-step instructions for configuring Google Cloud Secret Manager credentials, preparing and uploading secrets, and configuring Aerospike effectively.


The Aerospike Secret Agent is a tool that retrieves secrets from AWS Secrets Manager, Google Cloud Secrets Manager, and Hashicorp Vault KV Secret Engine. Its purpose is to simplify the process for other programs to access secrets from these various sources. Instead of each program needing to know how to access secrets from different places, they can simply request the Aerospike Secret Agent to handle it for them.
In this blog, we'll show you step-by-step instructions on how to set up the Aerospike Secret Agent and make Aerospike read secrets from the Google Cloud Secrets Manager.
The blog is structured into three parts:
Configuring Google Cloud Secret Manager credentials: This part guides you through setting up the credentials required to access Google Cloud Secret Manager.
Preparing and uploading secrets to Google Cloud Secret Manager: Here, we'll walk you through the process of preparing the secrets and then uploading them to Google Cloud Secret Manager.
Setting up and configuring Aerospike Secret Agent: This section covers setting up the Aerospike Secret Agent and configuring Aerospike to utilize it effectively.
Configuring Google Cloud Secret Manager credentials
The Aerospike Secret Agent can retrieve secrets from Google Cloud Secrets Manager using the following methods:
Attaching a service account
Application default credentials
Service account impersonation
Using service account impersonation is considered more secure than utilizing a service account key because service account impersonation necessitates an already authenticated identity, and the credentials generated through impersonation are temporary and do not persist. On the other hand, authentication with a service account key doesn't require prior authentication, and the persistent key poses a high-risk credential if it's compromised. Read more about Service Accounts.
Step 1: Create a service account with a "Service Account Token Creator" role attached to it. In this example, this service account is named base-service-account@xxx.iam.gserviceaccount.com.
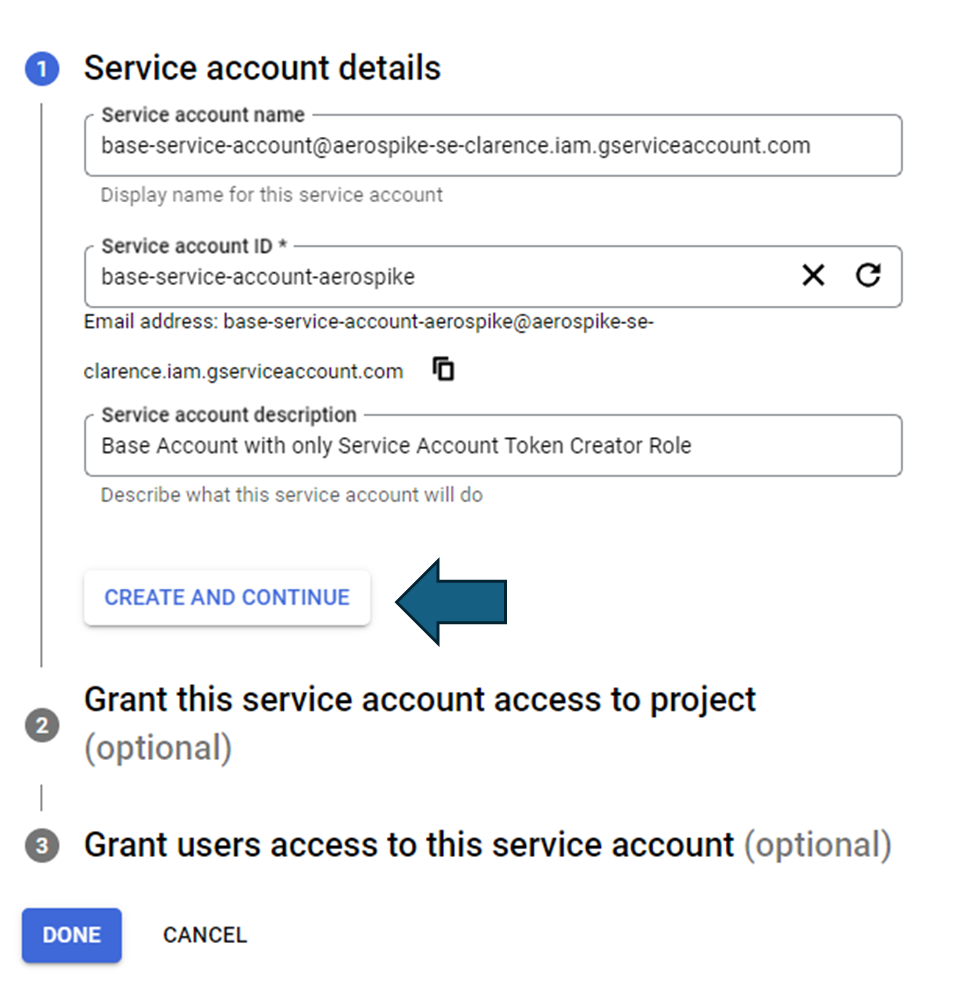
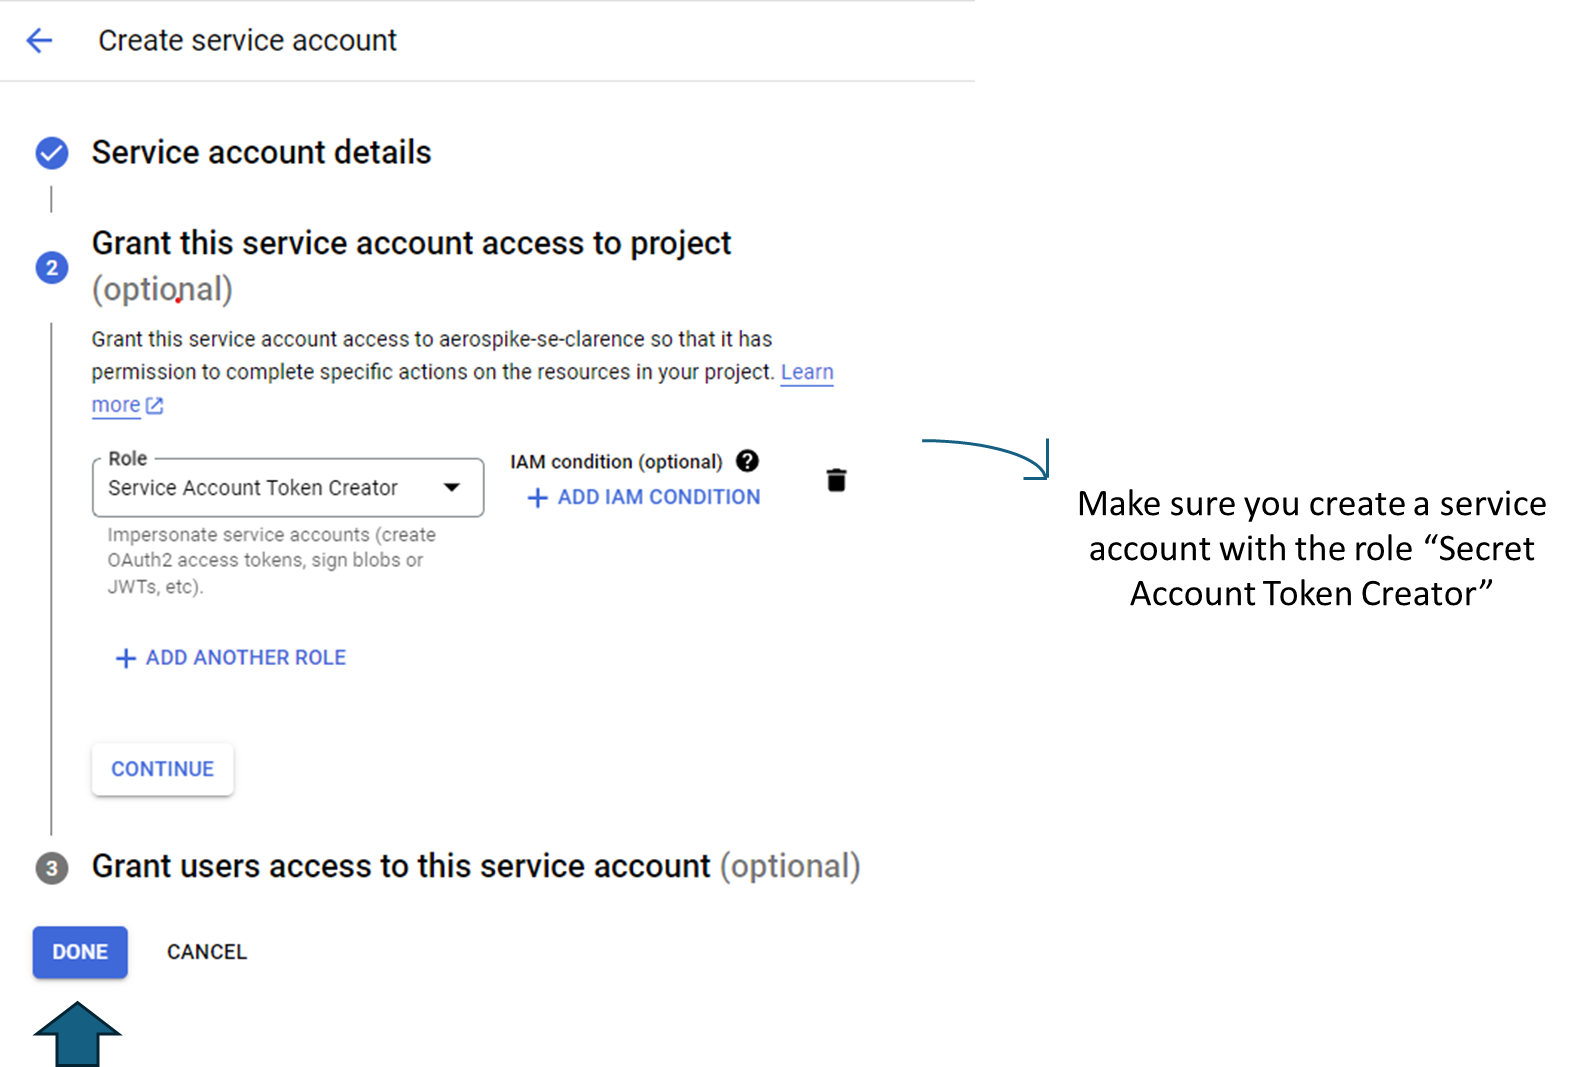
Once you are done, click on done.
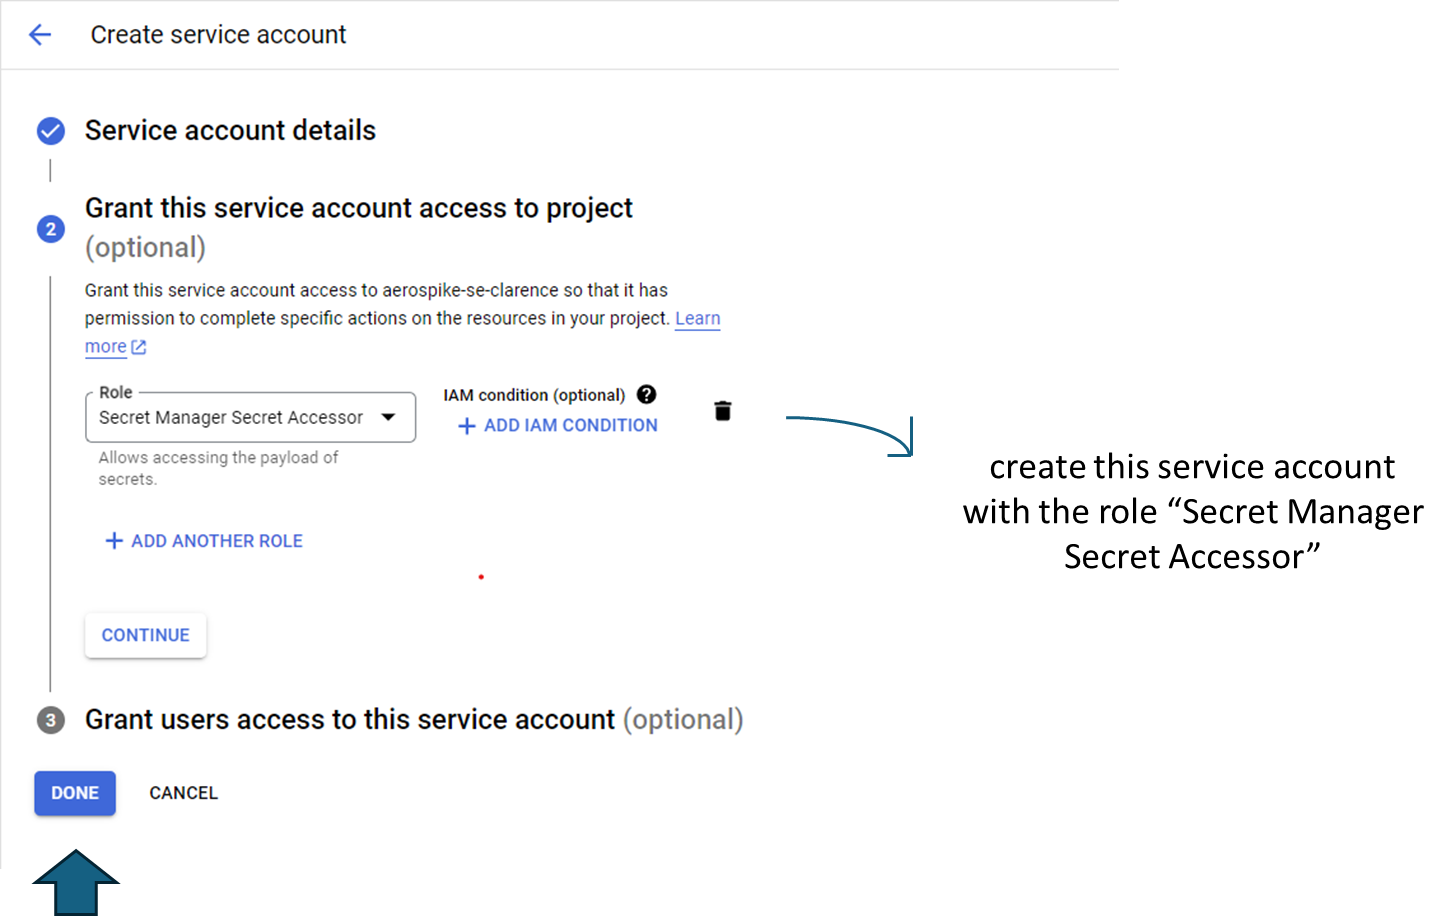
Step 2: Create a service account with a "Secret Manager Secret Accessor" role attached to it. In this example, this service account is named impersonating@xxx.iam.gserviceaccount.com.

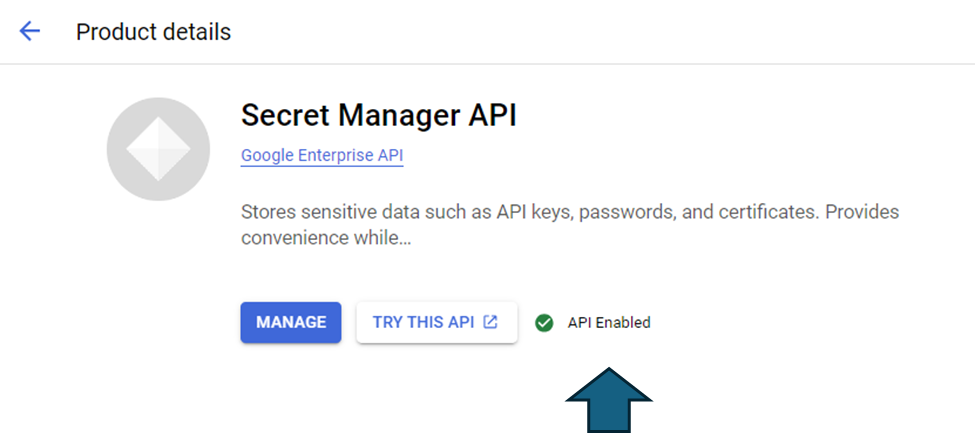
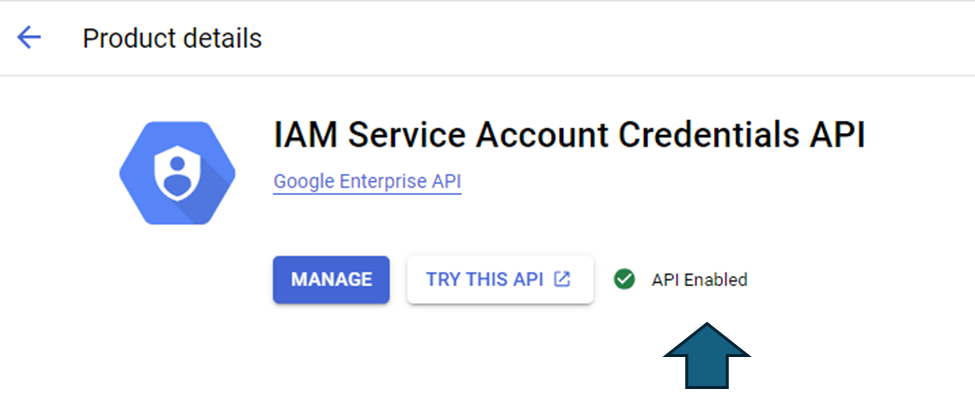
Step 3: Ensure that the “IAM Service Account Credentials API” and the “Secret Manager API” are enabled for your Google Cloud project. You can do so by typing the same name in the search bar of the Google Cloud console.
We have now completed setting up the credentials required to access Google Cloud Secret Manager. Let’s prepare and upload the secrets to the Google Cloud Secrets Manager.
Prepare the secrets and upload secrets to Google Cloud Secrets Manager
In this example, we'll upload several secrets to the secret manager. Storing these files locally could pose compliance issues for many organizations:
features.conf - Aerospike License file
cert.pem - Certificate File
key.pem - Private Key File
However, Aerospike supports the following configuration parameters:
auth-password-file
cert-file
encryption-key-file
encryption-old-key-file
feature-key-file
key-file
key-file-password
cert-blacklist
query-user-password-file
The Aerospike server requires that the secret value fetched be encoded in base64 format. To encode the secrets in base64, execute the following command and then upload them to the Google Cloud Secret Manager.
Please note that the cacert.pem file will remain in the local path and will not be stored in the Google Cloud Secret Manager, as it is not considered a secret but rather a public key.
base64 -w0 cert.pem > b64_cert.pem
base64 -w0 key.pem > b64_key.pem
base64 -w0 features.conf > b64_features.conf
If you're running on a virtual machine, download and ensure that the certificates are readily available on the local machine (just for ease) before proceeding with the upload process.
Upload secrets to Google Cloud Secrets Manager
Right now, you have the b64_cert.pem, b64_key.pem, and b64_features.conf files, which are secrets.
Let's double-check to ensure the attached service accounts have the right roles.
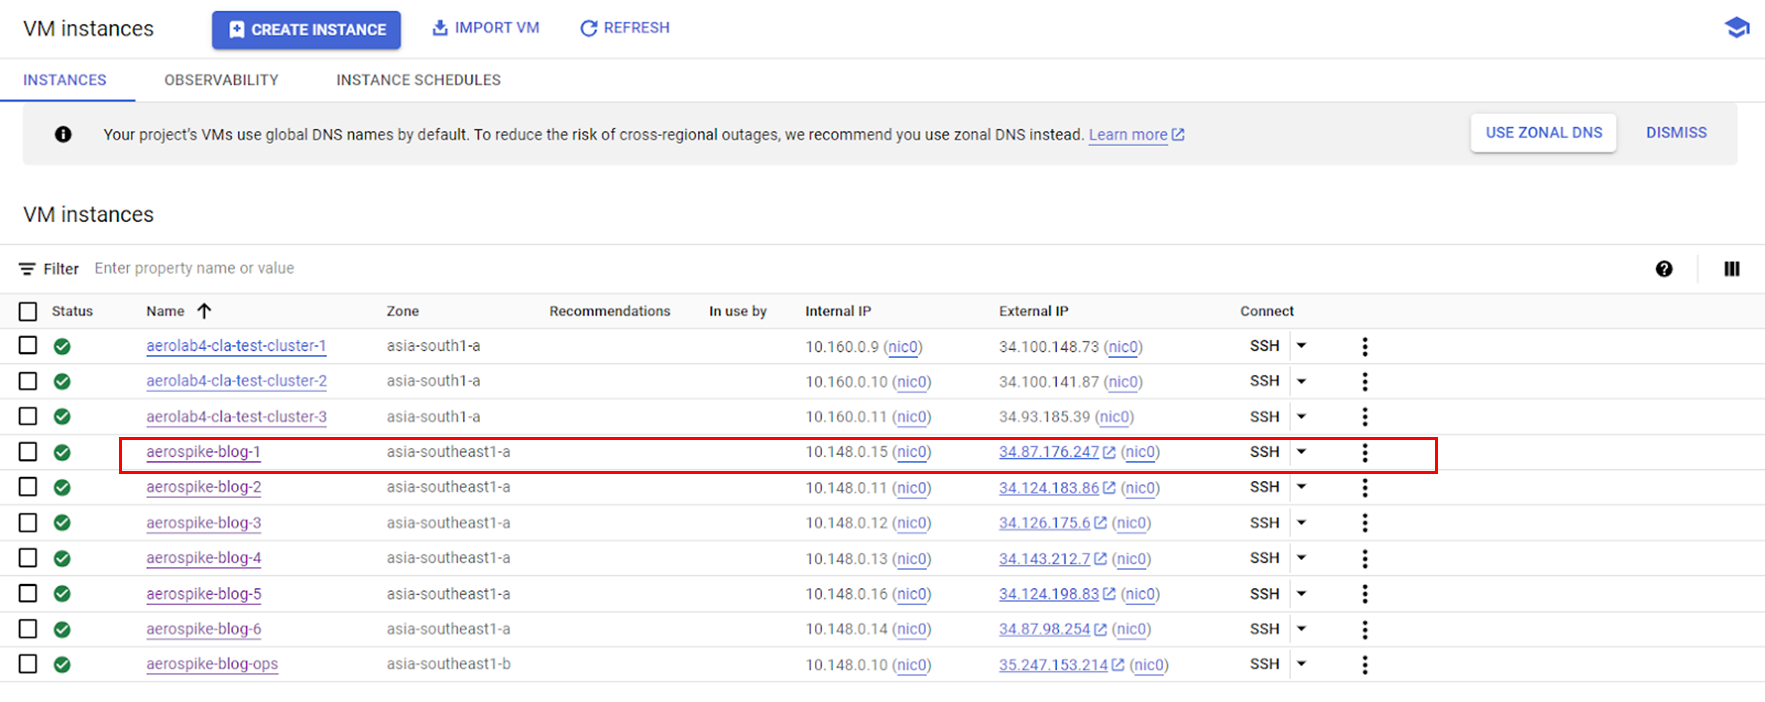
Step 1: Log in to the Google Cloud console, select the project, navigate to Compute Engine, and then use the filter option to search for the cluster's IP address.
Step 2: To access the service account details, click on the listed VM, which will redirect you to the configuration information page. The service account name is in the section labeled "API and identity management."
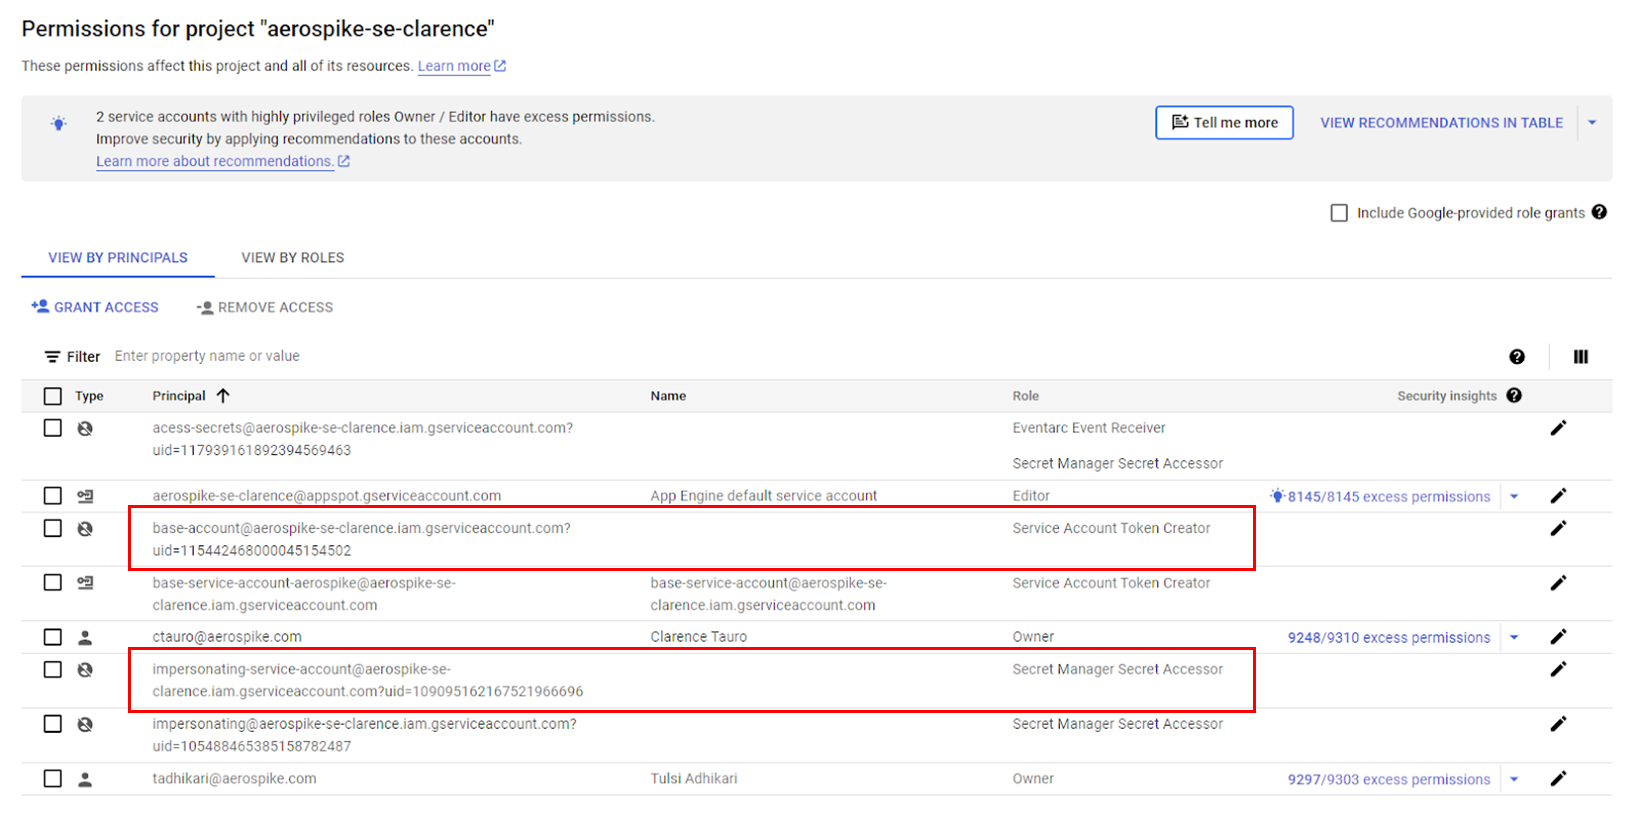
Step 3: Copy the service account name. To verify if Secret Manager is enabled for the service account, navigate to IAM, use the filter tab, and search for the service account obtained from the previous step. If you can see the "Secret Manager Secret Accessor" role assigned to the service account, it means that Secret Manager is enabled for the service account of the cluster.
Step 4: To create secret keys, navigate to Secret Manager, then click on the "Create" button. This action will redirect you to a page where you can add a secret key and configure it accordingly.
Upload the encoded secrets from your local storage. Make sure to verify the key file name before proceeding with the upload.
Select the location for the secret. In this case, the location is Asia-South1.
Click on "Create Secret."
Step 5: Repeat the same steps to upload all the secrets to the Secret Manager.
Step 6: To obtain the secret path required for configuring the Aerospike Secret Agent, navigate to the Secret Manager, search for the cluster name, click on the corresponding secret, and retrieve the secret path (as highlighted in the picture).
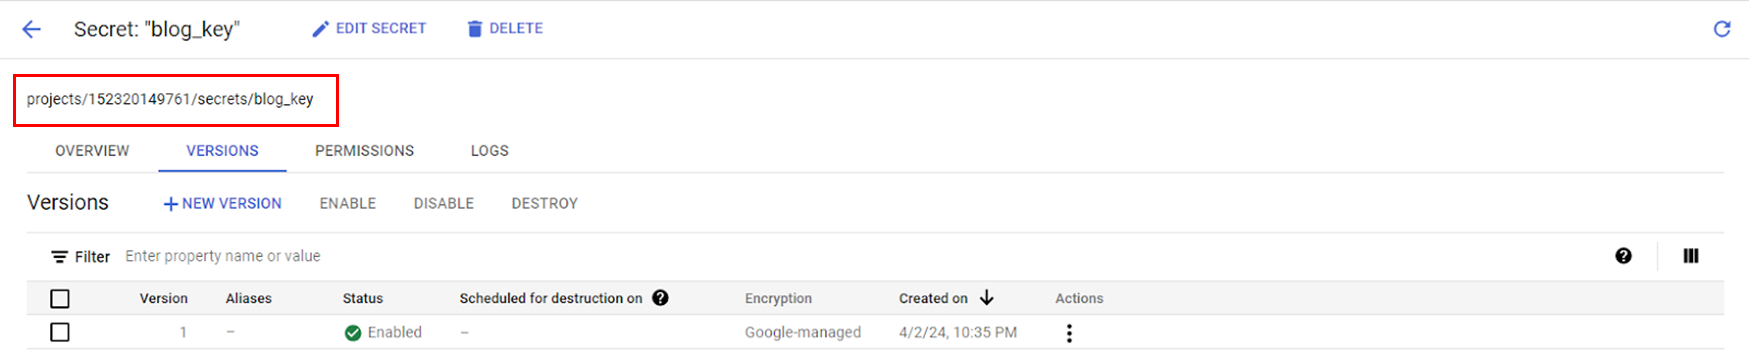
Here are the paths for accessing the secrets:
Blog Key: "projects/152320149761/secrets/blog_key"
Blog Certificate: "projects/152320149761/secrets/blog_cert"
Blog Features: "projects/152320149761/secrets/blog_features"
Make sure to keep these paths handy to access the respective secrets.
Setting up the Aerospike Secret Agent
The following steps walk you through setting up Aerospike Secret Agent to manage sensitive configuration for your Aerospike server. Aerospike Secret Agent acts as an intermediary, fetching secrets from a secure store like Google Cloud Secret Manager and providing them to Aerospike without exposing them directly.
In version v6.4.0, Aerospike introduces the capability to read secrets with external secret agents.
Step 1: Ensure you're logged in to your server environment.
Step 2: Download the Aerospike Secret Agent package.
Step 3: You can use the following wget command to download the package:
$ wget https://download.aerospike.com/artifacts/aerospike-secret-agent/1.2.0/aerospike-secret-agent-1.2.0-1.el8.x86_64.rpm
https://download.aerospike.com/artifacts/aerospike-secret-agent/1.2.1/aerospike-secret-agent-1.2.1-1.el9.x86_64.rpm
Step 4: Install the Secret Agent package: Once downloaded, install the package using the following command:
# rpm -i aerospike-secret-agent-1.2.0-1.el8.x86_64.rpmStep 5: Configure the secret paths: Open the Aerospike Secret Agent configuration file - vi /etc/aerospike-secret-agent/config.yaml - using a text editor such as vi:
service:
  uds:
    socket-path: /etc/aerospike/uds.sock


secret-manager:
  gcp:
    resources:
      cert: projects/YOUR_PROJECT_ID/secrets/blog_cert/versions/latest
      features: projects/YOUR_PROJECT_ID/secrets/blog_features/versions/latest
      key: projects/YOUR_PROJECT_ID/secrets/blog_key/versions/latest
    impersonate: impersonating@aerospike-se-clarence.iam.gserviceaccount.com
log:
  file: /var/log/aerospike/sa-log.log
  level: info
Replace the existing content with the provided details, ensuring the secret paths for cert, features, and ke are specified.
Note: Unix Domain Sockets (UDS) enable inter-process communication (IPC) between processes running on the same host with less overhead than network protocols, using file system paths instead of network addresses.
UDS considerations:
The Aerospike server and Aerospike Secret Agent should run on the same host, with the same user and group ownership for both processes.
The same UDS path should be provided in both the Aerospike server and the Aerospike Secret Agent's configuration files.
Step 7: Save and exit: Save the changes made to the configuration file and exit the editor.
Step 8: Restart the aerospike-secret-agent service for the changes to take effect:
# systemctl restart aerospike-secret-agent# systemctl status aerospike-secret-agentStep 9: Check and verify the Aerospike Secret Agent by accessing the logs
# vi /var/log/aerospike/sa-log.logChanges in the Aerospike configuration file
After starting, the secret agent successfully modifies the aerospike.conf file accordingly by replacing the secrets path.
To fetch secret values for the supported configuration parameters from the Google Cloud Secret Manager, specify the configuration value in secrets:[resource:]key format.
Step 1: Open the configuration file: Using a text editor like vi, navigate to the aerospike.conf file: vi /etc/aerospike/aerospike.conf
Step 2: Modify the service section: In the service section, replace the existing feature-key-file with the new secrets format. The features file, once stored locally, is now fetched directly from the secrets manager. Update the configuration as follows:
service {
...
     feature-key-file secrets:features:blog_features
     secrets-uds-path /etc/aerospike/uds.sock
}
Step 3: Update the network section: Previously, references to files in local storage within the network section will now point to locations within the secrets manager. Make the necessary adjustments:
network {
        tls myAerospikeTLS {
                     cert-file secrets:cert:blog_cert
                     key-file secrets:key:blog_key
                     ca-file /etc/aerospike/tls/cacert.pem
        }
…
Step 4: Restart Aerospike
systemctl restart aerospike
Summary
Configuring Google Cloud Secret Manager Credentials:
Create a service account with the “Service Account Token Creator” role.
Create a service account with the “Secret Manager Secret Accessor” role.
Enable "IAM Service Account Credentials API" and "Secret Manager API."
2. Preparing and Uploading Secrets:
Encode secrets in base64.
Upload encoded secrets to Google Cloud Secrets Manager.
3. Setting Up Aerospike Secret Agent:
Download and install the Aerospike Secret Agent package.
Configure the secret paths in the Aerospike Secret Agent configuration file.
Restart the Aerospike Secret Agent service.
Modify the Aerospike configuration file to fetch secrets from Google Cloud Secret Manager.
Restart Aerospike.